Step 10. Custom Mouse
Inside the root, make a layer and place it at the very top. Make your mouse there and make it a MovieClip with an instance name. Make a layer for the code and give the mouse an EventListener for when it enters the frame. This way, the code is activated every frame.
this.curmc.addEventListener(Event.ENTER_FRAME, custommouse);

function custommouse(event: Event): void {

}
To make the mouse follow the real mouse, set its x and y to the same as the real mouse.
this.curmc.addEventListener(Event.ENTER_FRAME, custommouse);

function custommouse(event: Event): void {
	this.curmc.x = stage.mouseX;
	this.curmc.y = stage.mouseY;
}
But the real mouse is still showing, so that needs to be hidden.
this.curmc.addEventListener(Event.ENTER_FRAME, custommouse);

function custommouse(event: Event): void {
	Mouse.hide();
	this.curmc.x = stage.mouseX;
	this.curmc.y = stage.mouseY;
}
Now it seems to work; however, you can’t click on anything. This can be fixed by typing these two lines.
this.curmc.mouseEnabled = false;
this.curmc.mouseChildren = false;
Now buttons work with a custom mouse.
Step 11. Cutscenes
Inside the game movieclip, make a new layer for the animation
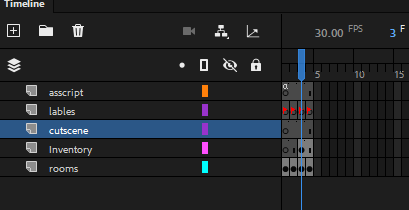
(If you want the cutscene to cover the inventory, place the layer above it; otherwise, below the inventory)
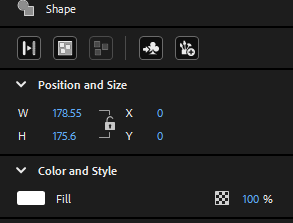
Draw something so you can easily identify what the cutscene is, and make sure its X and Y are set to 0.
Convert it into a MovieClip symbol. Inside it, move the drawing offscreen. This is so it can be easy to edit, and the player can't see.
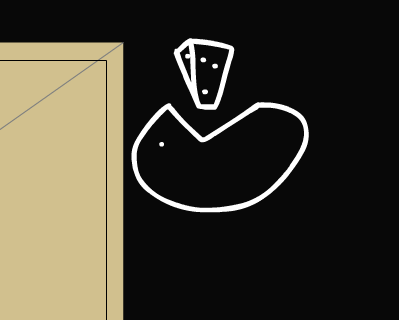
(ik such a good drawing that I should be scouted, no cap)
Then, in the second frame and onward, animate. The first frame should include nothing but that icon.
Make sure to include your stop(); on the first frame and last frame so it doesn’t play when loaded and loop.

(P.S. Shape tweens SUCK!!!)
Now, to make the cutscene work. Exit out of the symbol and give it an instance name.
Make it play when using the item. It should be the first thing it does when using it.
Object(root).game.Inventory.Invbox3.addEventListener(MouseEvent.CLICK, useInvbox3);

function useInvbox3(event: MouseEvent): void {
	if (Object(root).game.Inventory.Invbox3.currentLabel == "cheez") {
		Object(root).game.cheeseanimc.gotoAndPlay(1);
		MovieClip(root).eatenCheese = true;
		this.billymc.gotoAndStop(2);
		this.textboxmc.gotoAndStop("usecheez");
		Object(root).game.Inventory.Invbox3.gotoAndStop("empty");
	}
}
Now, to make another variable for keeping track of eating the cheese.
var eatenCheese: Boolean = false;
And then make it true when eaten
Object(root).game.Inventory.Invbox3.addEventListener(MouseEvent.CLICK, useInvbox3);

function useInvbox3(event: MouseEvent): void {
	if (Object(root).game.Inventory.Invbox3.currentLabel == "cheez") {
		Object(root).game.cheeseanimc.gotoAndPlay(1);
		MovieClip(root).eatenCheese = true;
		this.billymc.gotoAndStop(2);
		this.textboxmc.gotoAndStop("usecheez");
		Object(root).game.Inventory.Invbox3.gotoAndStop("empty");
	}
Then, adding the check in all the rooms to make sure the effects apply
if (MovieClip(root).eatenCheese == true) {
	this.billymc.gotoAndStop(2);
} else {
	this.billymc.gotoAndStop(1);
}
That’s all for the basics! If you want to learn more or have any questions, leave a comment below, and I'll try to answer when I can. Here is the final product (with some extra things added to make it a game)
As an award for reading all of this, I present to you the Riddle Company source file, because one of the ways I learned was by looking at other games and seeing how they did it. Since Riddle Company is a part of Riddle Middle School, it got a little deformed on its way out, but that’s now your homework to fix it.
I would love to see what you all make with this. Make sure to @Minix07 if you want me to have a look at it!